LEARN HOW TO USE CLICKCLIX
Instructions for use
The setup for ClickClix buttons and adhesives is extremely simple and fast. In the case of the button, and in order to make it easy for you, with every order you will receive our applicator tool designed specifically for this task. Next you will find step-by-step instructions on how you should proceed to install and start using your ClickClix. As you can see, procedure is simple but if you have any doubt, please contact us and we will solve it.
Instructions for ClickClix M/L
Step 1: Prepare the tool
With your order, you will receive our tool (figure 1), designed to help you with the installation of the button.
Place each one of the two parts on the tool: at one end, place the button; at the other end, the ring (Figure 2). You are now ready to install your ClickClix button!
Fig. 1

Fig. 2

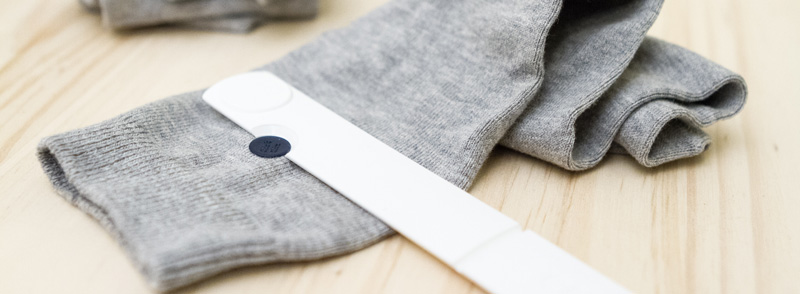
Step 2: Install the button
To facilitate the application, rest the clamp on a flat surface, then place on the ring the garment or fabric (in the example in Figure 3, a sock) where you want to install the button and fold the clip until the ClickClix is locked.
If you still have questions about how it works, you can see in the following video the whole process in detail. And we are always at your disposal to help you through any of the forms of contact available.
Fig. 3

If you want to remove the button
If, for any reason, you want to remove a ClickClix button, you can do so with the application tool. It has a notch where the button fits (Figure 4) so you’ll be able to pry the button off the fabric.
Keep in mind that ClickClix was designed to remain attached to the fabrics and, if disassembled, it may lose its properties and if that happens, it’ll stop working.
Fig. 4
Instructions for ClickClix Adhesive
Paso 3: Clean the surface
Start by deciding where you want your ClickClix and clean the area. With your order you will receive an envelope like the one in Figure 5, open it up and use the wiper you’ll find inside to clean the surface so the adhesive efficiency is maximized.
Fig. 5

Fig. 6

Step 4: Adhere the ClickClix
Next step is to remove the adhesive protective paper (Figure 7) and place the piece in the desired location. Apply sufficient force to ensure that it is correctly attached.
The following video is an example of one of the many applications of ClickClix Adhesive: support for smartphones and gadgets.
Fig. 7

Combining ClickClix
Step 5: Combine as you wish
Button On Button

Two ClickClix buttons is all you need to close a curtain, match a pair of socks, close a pillowcase, attach your duvet to the cover, and many other applications.
…on button

Once attached to the fabric, ClickClix can be attached to another set, and then to another one, and to another one… You can even join buttons of different sizes. Possibilities are limitless.
Button On Adhesive

ClickClix buttons are compatible with ClickClix Adhesive. Possible applications for the ClickClix Set include hanging towels and dishcloths.
Adhesive On Adhesive

Use the ClickClix Adhesive as a solution for fixing devices and gadgets, organizing your workspace, your vehicle or your home.